Friday, August 7, 2015

Uncle Steve's Farm, 1950s


A cousin posted this photo on Facebook.  It brought back memories of family reunions each summer in the fifties.  Mother's family was large.  Every year everyone would get together one Sunday toward the end of summer.  Many times the reunion was at Uncle Steve's farm.  Uncle Steve was one of my mother's older brothers.  In the early years I remember Grandma and Grandpa Smith being there.  Sometimes their siblings would come, too.  Now my cousins and I are the old people.

This picture was taken from near the creek that meandered through the property.  Most of the relatives would have been up in the yard around the windmill.

The watercolor painting I did is small, only  8 X 10 inches but it brings back memories of those hot sunny days, and of  family, laughter, and a potluck meal.


After sketching the scene, I put masking fluid on the Queen Anne's Lace in the foreground.  Then I laid down light washes.  I decided to play with the colors of the shadows  and also decided to go for a light airy feel.


The little pile of rocks in the foreground developed out of the wash I originally laid down.  I debated about using a pen to draw in the windmill and television antenna on the house but opted for a fine brush.  As I am writing this, I notice that the antenna has no crossbeams on it.  They are barely visible in the photograph.  I will consider how I want to add them.  Right now the antenna looks like a giant lightning rod.

I started emphasizing the foreground plants.  I wanted to aim them toward the barn and let the berry bushes lead from there to the house.


I added a few more plant details and thought I was finished until I wrote this blog.  Now I will do a bit more on the antenna and darken the chimney a bit.  Then the painting and this blog will be ready to post.

Complete with antenna and chimney.


.

Tuesday, August 4, 2015

Beautiful Birds...What Are They?

Tom and I like to visit zoos.  It doesn't take long for my brain to be overwhelmed by the beautiful and interesting creatures that we see.  Sometimes, we remember to take pictures of the signs posted.  If we do, they are a big help when we get back home.  Otherwise, memories of the animals disappear into the muddle of accumulation of a lifetime in our brains.

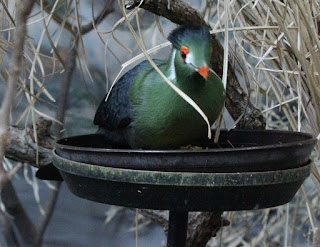
Below are the signs we photographed at the Toledo Zoo this past weekend and below the signs are the photos of some of the birds on the signs.  I labeled the bird photos in our computer files for our personal information but I will make this blog a choice for you.  If you really want to, you can click on the signs to enlarge them  and learn the names of the birds.  If you just like to look at pretty birds and don't want to stuff more information in your brain, just enjoy the pictures.  The birds are from Africa or Australia.


Enjoy the photos.

From Africa

From Africa

From Australia

From Australia


From Australia


From Australia


From Africa


From Africa


Friday, July 31, 2015

July 25, 2015...Brukner Butterfly Transit

Monarch

We were searching the plantings around the Interpretive Center porch when I spotted this.  Both Tom and Phil took photo after photo.  This is the first Monarch we have seen on the transit this year.

Monarch

We also found these larvae.  After checking in Caterpillars of Eastern North America by David L. Wagner, I think they are young Milkweed Tussock Caterpillars.


Nancy and Phil were in charge of the transit today.  Ruth and Jackie were at a Native Plant Convention.  Tom and I and our grandson, Steve, were the other members of the transit group.

Tom saw this female dark phase Tiger Swallowtail near the new porch when he came downstairs from looking at birds.  The rest of us were on the woodland section of the transit by then.


Dark Phase Female Tiger Swallowtail

Meanwhile, in the woods, Phil was taking photographs of an Anglewing.  I think Nancy got a good enough look at it to ID it as a Eastern Comma.

Anglewing

We saw the most butterflies along the Brukner Drive.

Summer Azure


Question Mark

The silvery curve and dot are visible on the underwing.

Silver-spotted Skipper on Purple Coneflower.

This photo I sent to Ruth for identification. It reminded Tom and me of a fritillary but seemed small.
Ruth decided it was a Tawny Emperor.  Tom and I rechecked in our field guides and agreed she was right. The eyespots on the hind wings cinched it.

Tawny Emperor

This was not my day for taking photos of butterflies.  Maybe next week.  Steve found other things for me to photograph.

Northern Spring Peeper

Green Frog in Catface Pond

Stinkbug

Toad

Thursday, July 30, 2015

Lilian Nichols Shows Us How to Make a Basketweave Cane with Polymer Clay

Lilian Nichols--basket of flowers

We have learned to make the various flowers in previous sessions.  This time we learned to make the basket to put them in.

We chose three colors plus black cut in triangles to make our Skinner blends.  Notice that each triangle is a different size.  From left to right, black is the smallest, second color is much larger, the third color is largest of all and the fourth color is second smallest.  (If you don't know how to make a Skinner blend, almost every polymer clay how-to book tells you how.  I expect that you can find directions on the Internet also.)

Annette'sChoices


DeeDee's Choices

Pauline's Choices

Next we made blended the colors by putting our triangles through our pastry blenders over and over.

Annette's

DeeDee's

We needed a long narrow strip so we folded the rectangles in thirds.  We folded the black to the black, the second color to the second color and so on.


Let's follow Annette as she lengthens her now narrow strip.


Each time she ran it through the pastry blender she adjusted the pastry blender to make the strip thinner and as a result the strip grew longer.  Finally it was so long that it was difficult for her to handle by herself so Lilian cranked and Annette guided the strip.


The next step is to cut a 1 1/2 inch (3.8 cm or 4 cm) piece off one end.  Stack that piece on top of the new end.  Proceed until you have a stack of pieces.


Below are DeeDee's pieces stacked.


Here is my stack as I am cutting it so I will have two stacks with edges like the one in Dee Dee's example.


Lay the light edges together so the new stack looks like this.  I pressed these close and sliced off a strip lengthwise which I used later to make a twisted basket handle.

 Pauline's


Annette's before (above) and after (below) she has added a piece of white, then a piece of black on both sides of the block.  Note she has covered the long light strip side.


Now comes the squeeze and stretch time.  This takes careful work because we want the various colors to keep the proportions of the original, the difference being that all of them will be smaller.
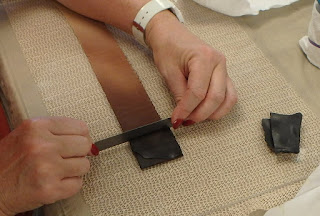
Rectangular blocks or wood or plastic can help you keep the cane the same size from one end to the other.
DeeDee's

Squeeze and stretch until you have a cane 14 inches long.  (35.5 cm).  The inch on either end tends to be distorted.  After discarding the ends, cut the remaining 12 inch (30.5 cm) cane into 12 equal sections.


Here are 10 of DeeDee's sections of cane.  She cut 2 more for a total of 12.


The next step is assembling a new cane using the 12 pieces.

Row 1


Row 2 is the reverse of Row 1, Row 3 is the same as Row 1 and Row 4 is the same as row 2.


Add  thin strips of black along edges where they are needed to form a straight-edged rectangle.


Now  it is squeeze and stretch time.  I discovered that I had a tendency to squeeze the corners too much.  I plan to practice this cane again.  The center section was more evenly squeezed and stretched than the ends.

Below is my center cut.


The cane is now ready for using.  I sliced off 8 slices to make the upper basket.  I placed 4 in a row and the other 4 below those.  I made the edges and handle by twisting the scrap I had sliced off the original stack.  The lower basket is 2 rows of 3 slices.


Annette covered a small vial.  the lid is to the right back.


DeeDee was still debating what she would do with her cane at the end of our session.


 She cut off a thin slice to bake and serve as a reminder for future reference.