Monday, April 27, 2015

Corkscrew Swamp Sanctuary

In mid February, Tom and I decided we were tired of cold weather and snow so we headed to Florida to visit friends and relatives and also to do some birding.  We haven't  been to Florida for many years.  There was no way we could do all the things we wanted to do.  But we did those things that were top on our list.  We visited our friends and relatives, then chose some of our favorite side trips from years ago.

Corkscrew Swamp Sanctuary was one of our "must sees".  We wanted to see the Painted Buntings.  They never come as far north as Ohio.  The last time we saw the beautiful little birds was at least ten years ago.


We saw only the males.  The females come a little later.

There have been a lot of changes since the last time we visited the sanctuary.  The lands along the road to the sanctuary are crowded with homes and shopping areas.  Ten years ago, the road wound through woods, swamps and grasslands.

The Interpretative Center is new and much larger.  I like the upholstery on the couch.


There is also a cafe in the center which is very nice.  When we visited the last time the only food was what we brought with us.

The entire walk is now by boardwalk.  Years ago, sections were earthen trails.


The following photos show some of the sights along the boardwalk.


Red-shouldered Hawk


Epiphyte (non parasitic plant growing on another plant)


Blue Flag (I don't know which variety this is.)


Little Blue Heron walking on Water Lettuce (Pistia stratiotes)


The largest cypress trees in the swamp are named for famous regional and national naturalists.  This one is named for Aldo Leopold.


A wide variety of ferns...


Black-crowned Night-Heron...


Signs with natural history and ecological information...


Snowy Egret in breeding plumage...the birds were killed in the early part of the twentieth century for these feathers.  The fashion was to put them on women's hats.


Typical swampy area...


What is this?  It is a part of one of the earlier photos in this blog.


What is this?  Again, it is part of one of the earlier photos in this blog.

Right click on the photos to enlarge them.  Left click to get back to blog.

Wednesday, April 22, 2015

Steve Makes a Polymer Clay Pot


Steve was our house guest for part of his Spring Break.  One day he made a little polymer pot similar to an air dried clay pot he saw on my studio shelf.


He chose three colors of clay...Pink, Ecru, and Green. He used 1/2 package of pink, 3/4  package of Ecru and 3/4 package of Green.

After he used the polymer clay razor-like blade, I realized he could use an old paring knife instead.

I have a set of nesting circular clay cutters.  The smallest cutter that he used was about 1 1/2 inches in diameter.

Cookie cutters would work also.  Something to keep in mind is that polymer clay tools should be used only for the clay, not for food.


The most boring and time consuming part of working with polymer clay is conditioning it...warming it with your hands as you work, making it softer and more pliable.  He softened each piece by squeezing and rolling it with his hands.  Then he rolled the clay with my clay roller.  Any plastic roller will do.  Wood is not slick enough for the job.


Steve rolled, then watched a bit of  TV, then rolled more while I kept track of his progress on the conditioning.

When the clay was rolled thin enough to roll through the pasta machine, he switched to using it.  He enjoyed using this tool.


He passed the clay through the pasta machine until the clay was still softer.

Then he formed each flat section into a "snake".


After he had his three "snakes" made he twisted them together.


When the multicolored "snake" grew long, he broke it into two pieces and twisted them together.


 The more the "snake" is twisted the more the colors will mingle.  Eventually he had the "snake" twisted to his satisfaction.


He shaped it into a thicker shape by folding it in half and squeezing and rolling.


I still hadn't figured out that he could use a paring knife for cutting at this point so he used my clay blade being VERY careful.


He rolled the portion he cut off into a ball and then flattened it with the roller.


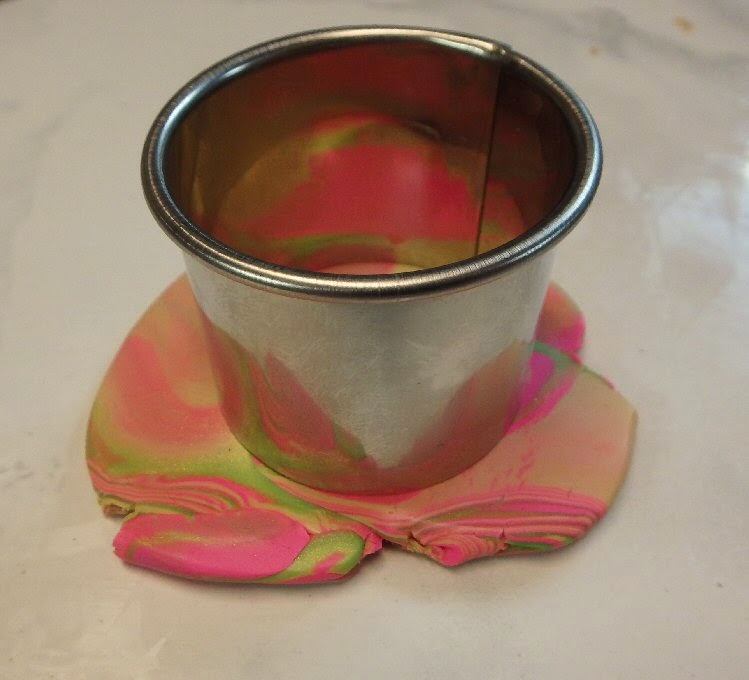
He used the middle-sized cutter to cut the base of the pot.


He cut off the portion for the sides of the pot, leaving enough to make the three piece lid.


Next came rolling the side portion lengthwise to stretch it long enough to fit around the base.


He checked to see if the piece would wrap entirely around the base.


He rolled the piece a little longer.


Then he laid a ruler on the clay and cut down both sides of the ruler using an old paring knife.  I helped him hold the ruler.  You can see the base for the pot at the bottom of the photo.


He wrapped the rectangular piece around the base and pushed it gently against it so it would adhere.


The lid was next.  He made the circle exactly as he had made the base circle but he used the largest cutter.


He made the underside insert for the base using the smallest cutter.  The underside insert is centered on the lid and keeps the lid from falling off the pot.  This photo does  not show this very well.


Perhaps you can see it better on the lid of the air-dried pot.


On the top side of the lid he pushed down a ball of clay for the handle.


I baked the two pieces side by side in a 275 degree oven for 25 minutes.


And here is his pot.


He told me it would be a good container for earrings.  He decided it would be a good container to hold coins, also.


Thursday, April 16, 2015

Spring Has Sprung...It Happened between April 4 and April 11, 2015 at Charleston Falls


Photo by Jeanne Oates Estridge...Purple Cress (Cardamine pratensis)

This is it, the first ephemeral that Jeanne and I saw this spring.  I was amazed.  We were looking for the White Trout Lilies (also called Adder's Tongue and Dogtooth Violet).

When we found the Purple Cress, I said, "Let's backtrack and go down through the ravine.  The flowers bloom there first."

Jeanne agreed.


It was a worthwhile change of plans.


We found Bloodroot blooming.

The Dutchmen's Breeches were showing buds but were not blooming.

We were both delighted that spring had arrived and knew we would find more the following Saturday.

And we did.

There was more water pouring over the falls, too.


The flowers...


Virginia Bluebells
(Mertensia virginica)

Dutchmen's Breeches
(Dicentra cucullaria)

Photo by Jeanne Oates Estridge
Hepatica
(Ranunculaceae Hepatica)


Bloodroot
(Sanguinaria canadensis)
The flowers were closed because the day had just turned from cloudy to sunny.  They would be in full open bloom in a half hour.


This is why we don't always hike the ravine trail.  It is rugged for this part of Ohio.  Abby is an old dog.  The trail is tough on her.  Of, course, it is not tough on us!

After walking the trail down into the ravine and back up, we headed down Redbud Trail.  That is a steep downward trail.  The walk was worth it.  Here is what we found at the bottom.
                      
At first, all we saw were the leaves but we kept searching. And then we found what we were looking for last Saturday...White Trout Lilies (Erythronium albidum).  It is also called Dogtooth Violet or Adder's Tongue.


Here is another cluster we found a bit later down the trail.