Showing posts with label Art Projects. Show all posts

Sunday, April 8, 2018

Spring Is Slow in Arriving This Year, April 8, 2018


 Jeanne and I went walking at Charleston Falls  on April 7.  Last year we saw flowers.  This year we saw snow.

Finally on the trail that is behind the falls we found a few flowers.  They were bluebells...not very tall and just beginning to show buds.


The wildflowers are here.  Just under the snow today.  I walked on Wednesday March 28 and found the flowers below.


PurpleCress...


Leaves of Trout Lilies ( also called Adder's Tongue and Dogtooth Violet)


Waterleaf...not sure which species...


Spring Beauty


The Bluebells were showing blue buds then, too.

There was more water dropping over the falls on March 28. We had had rain the previous day...all day long...sometimes just a mist, sometimes torrential downpours.


I am still working on my Self-challenge...sketches from photos I've collected over the years.  My grandson posted 104 days in a row.  I am not doing that well.  Sometimes I work on a sketch on and off for two or three days before I am satisfied with it.  I plan to continue the self-challenge until I have done a 100 sketches.  By then I hope to be doing some of them in watercolors.


Thursday, February 8, 2018

Weekend with Steve, February 2,3 and 4

Now that Steve lives further away, we don't see him as often as we did when he was younger.  It was good to see him and he was happy to see us.

I took him to Brukner Nature Center on Saturday.  We spent most of our time in the Bird Vista room.  The staff keeps the various feeders filled so generally we see a variety of birds.

We saw the usual ones like American Goldfinches and House Finches.


And we saw the usual woodpeckers including the Red-bellied Woodpecker.


We caught a glimpse of a Pileated Woodpecker.  Because we had my binoculars we were able to watch it even though it flew off into the trees.

Best of all, Steve saw a life bird which is a bird he had never seen before...a Red-headed Woodpecker.  The bird flew closer a few times but didn't stay long enough for me to take its picture.  It stayed out further on this branch for several minutes.  Must have found a tasty snack.


On Sunday, Tom and Steve made Banana Cake/Bread.  The recipe is one of my mother's.  She always made it in a cake pan.  We usually make it in small bread pans so we can share it with friends and neighbors.  Steve took one home and gave one to Gemini who picked him up on Sunday afternoon.


*************************************************

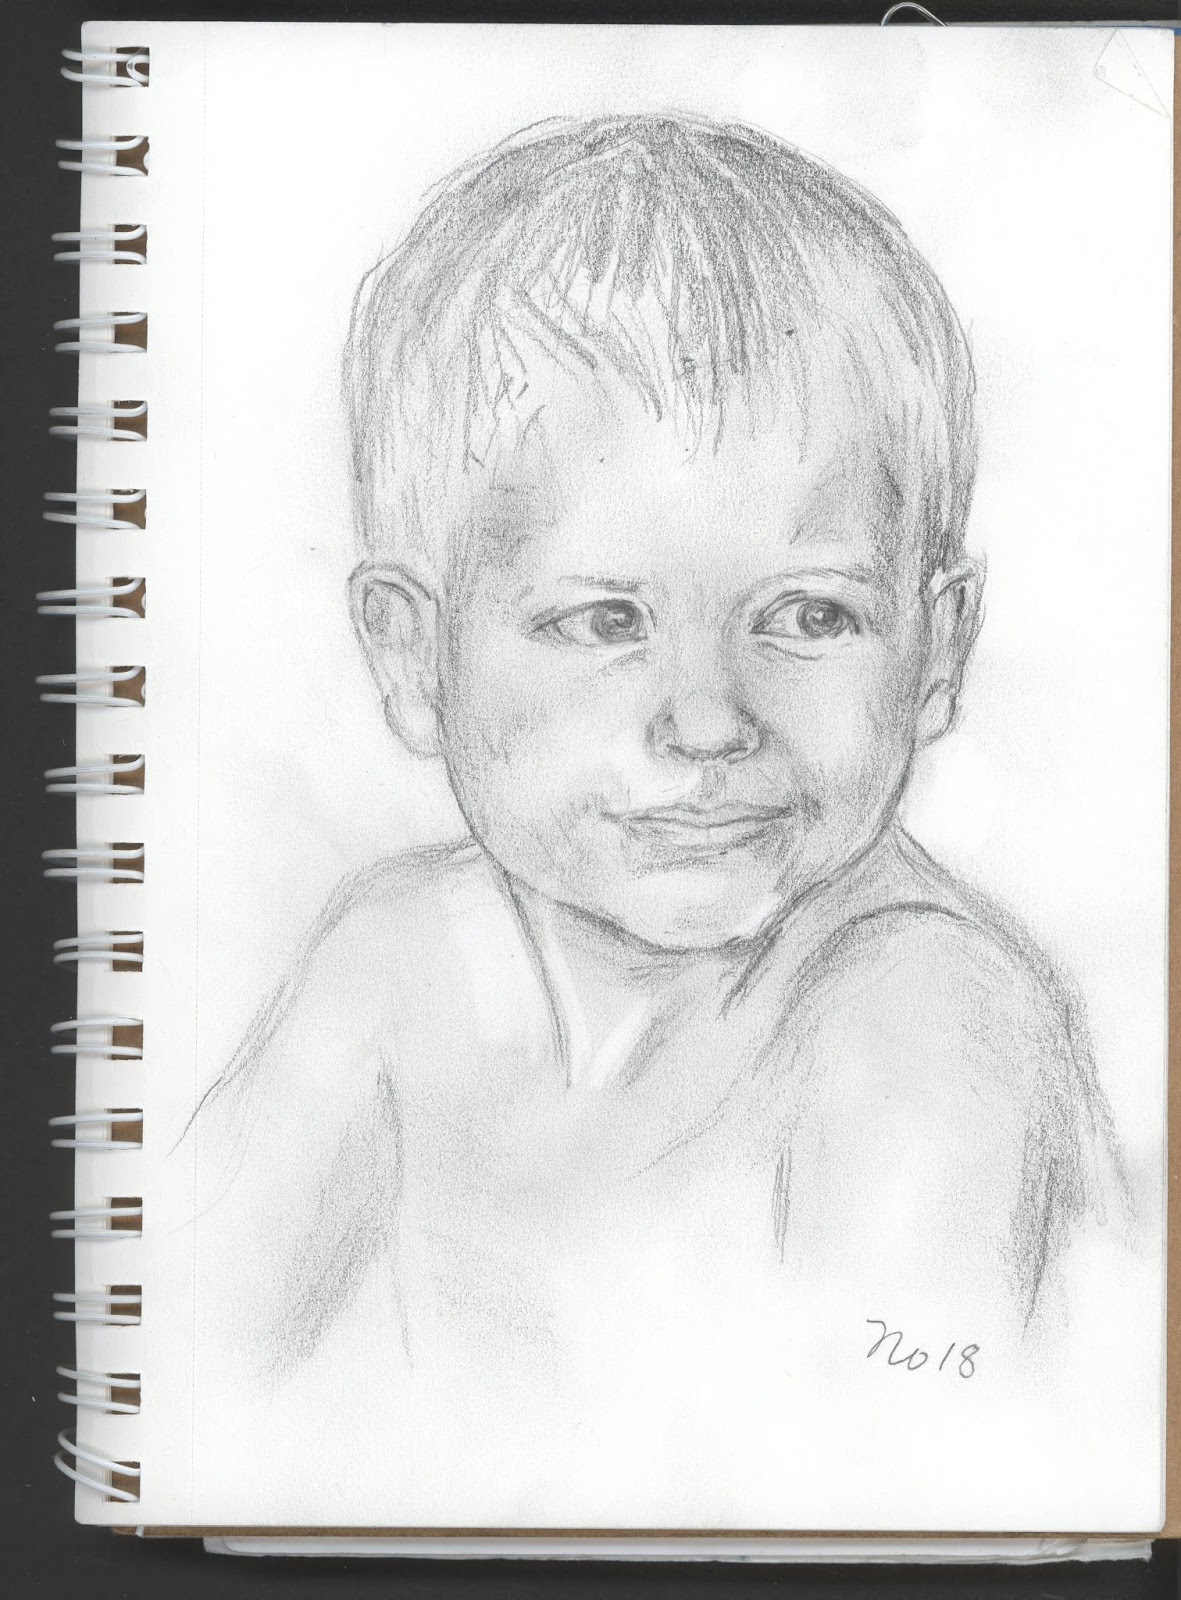
Update on my sketch a day challenge.  I am doing a sketch most days.  Below is No.18


Here is the photo I drew from.


Monday, January 22, 2018

Sketching Goal, a Sketch Every Day...(So far I have missed two days)

Yesterday's drawing...


As I drew, the child in the photo I worked from evolved from a mostly front photo to a side angle.  That happens sometimes.  I only have control of my pencil sometimes.  Here is the original photo.


Other times I get a pretty close likeness .


And, the ones I get the best likeness on are the ones I spend the least time on.  My eyes and my hand and brain are working together.


If I draw a sketch a day and study the how-to books on drawing faces, I  expect to have more eye-hand-brain control eventually.

I have liked to draw faces from the time I was a child.  I remember I was overjoyed to discover I could put a bump on the side of an oval and the bump looked like a nose.  That was in first or second grade.

Three things worked together to jump start me on this project.  I started sorting through our accumulation of photos.. eighty years of pictures from our lives.  Then there are some pictures of ancestors as well.


On the far end of the table are two plastic boxes which I think are sometimes called sweater boxes.  I have four more boxes that size filled with photos.. And then there are Tom's boxes of photos...another five boxes.  Fortunately, I have dates on the majority of them.  This time around I am adding names.

At the moment, I am sorting the photos into individual boxes for my three children and eleven grandchildren plus a box for ourselves and a box of photos to give to various other people.


As I sorted I came across pictures I thought would be fun to draw.

So 1. sorting...2 finding favorite photos...3...one of my grandsons decided to challenge himself to a drawing a sketch a day and has been posting at least one each day on Facebook.  He has posted almost sixty days without a miss.

I have already missed two days.  But I'm on a roll again.

Tuesday, August 22, 2017

A Bouquet of Prairie Flowers, August, 2017


Earlier this month, Marsha came to paint with me.  I was pleased to see her.  I haven't been painting much for several years.  I needed a jumpstart.  Marsha, bless her, seems to have done that.

The flowers in the bouquet are from our yard...the smaller yellow ones with the graceful thin stems are Tall Coreopsis, the bigger yellow ones are Oxeye, and the orange are Butterflyweed.  The pitcher is one we bought in either Williamsburg or Jamestown, Virginia.  I remember Williamsburg.  Tom remembers Jamestown.  I received the tatted star doily in a Christmas gift exchange when I was co-oping at Landers Corporation in Toledo my senior year in high school.


This is how the painting looked after the painting session with Marsha.  I started with a rough sketch using a Micron pen, then laid in watercolors.  I was hoping to keep the painting as a sketch, an impression, not a photographic image.


I always need to make frequent stops to "think".  This was the result of my thinking.


Another day to "think".  I decided to lighten the fabric on the right side, also to redarken the leaves at the pitcher edge.  I had wiped out a lot of the color.  Then I went bolder with the watercolor.  The very last strokes I made were a few with a white gel pen to bring back some reflections on the pitcher.


Wednesday, April 12, 2017

Watercolor Portrait for a Friend


I was glad my friend liked this 8 X 10 painting of her mother.  The baby is  my friend's son.


The photograph I used as a starting point was this one which is about three and one half inches across and the same vertically.

Thanks to the marvelous computer, I was able to enlarge the photo, crop it, and adjust the color.


In the first watercolor, I decided to emphasize the faces and darken the rest of the painting.  I wasn't thinking about it being hung by another painting I had done in 2009.


What my friend had in mind was something more similar to the one I painted in 2009, a painting of her husband's mother and the other son.


I started again, this time using lighter, brighter colors.


A commission is about pleasing the buyer.  I am happy the second one pleased her.

Sunday, January 17, 2016

Polymer Clay "Wood"


My eleven year old art student has been asking me to let him model with polymer clay so a few weeks ago, he looked through my polymer clay how-to books and picked out a couple projects.

"Wood" polymer clay masks were one of the projects he picked.  I told him I would experiment with making wood and we would try making a mask.

I found directions, each set different, in four how-to books.  Most of them called for using four wood-like colors but one book called for three.  Since this was a my first attempt I decided to use three colors.  One of the other books suggested using metallic colors mixed with the wood colors to give the wood a sheen.  I used that idea, too.

I used scraps of clay from other projects so I can't give you the amounts by the usual method of one block or one quarter block.  I used circle cutters from my box of cutters which I bought on-line.  I chose a large, a mid-size, and a small size because several of the books suggested using different amounts of the various colors.


It took a while to mix three appropriate colors.  Below is the first combination I chose.  I decided the colors were too contrasting and remade colors choosing colors that were a little closer in value (but still contrasting)  I also decided to mix the colors more thoroughly.


Below is the second set of colors I used. Later I premixed enough of similar colors so my art student and I could each make a wood cane.  His class is one and a half hours long, not long enough for him to mix his clays and also make a mask.


All of the sheets were rolled through the pasta maker at the second thickest setting. The largest circle was cut from the mid-value brown, the smallest circle was cut from the deepest value brown and the mid-size circle was cut from the lightest brown.  Approximate sizes of cutters in the photo.


Next I rolled each circle into a ball, and flattened them with a clay roller so I could put them through the pasta maker again.  I rolled the mid-value color first on the second thickest setting.  In order for the lightest brown to be a large enough sheet to cover the first one, I had to roll it through on the fourth thickest setting.  The dark value had to be rolled even thinner.  I stretched the second and third sheets gently to make them the size of the bottom layer.  Now I had the the various thicknesses several of the how-to books suggested.


Next came stacking.  


Cut stack in half.  Lay one on top of the other.  Do NOT lay the dark against the dark. 


 Cut again.  Note the tiny lines where I released the air trapped under the dark layer.


Stack again.  Cut on the green line for yet another stacking.


Note that the stacks are not precise.  This didn't seem to be necessary.  It is necessary to remember NOT to lay dark against dark or mid-color against mid-color.


Form the stack into a rectangular box.


Bend the box.


Bent box.


Form the clay into a rectangular box and bend again.


Repeat until you like the "wood" rectangle you have made.  It took me three times bending and reforming into a rectangular box to get what I liked.

 Final rectangular box.


Sliced box.


Slices laid so the inside cuts are visible.  These are always surprises.


I laid one slice sliced edge up and rolled it thin enough to go through the pasta maker. ( This slice was from a later rectangular box.)


After being rolled through the pasta maker.


Cut an oval that will use about half of the sheet.  The oval will become the mask.  The rest of the sheet can be used for the nose, ears and other additions to the mask.


A drinking straw can be used to cut out the eyes.  The ring in the nose is a jump ring which can be bought in a jewelry craft section of craft stores.


Cut a heart in half lengthwise to make ears.


Lay the finished mask on a sheet of clay rolled at the second thickest setting on the pasta maker.  The first time I didn't do this and the ears fell off.  The backing sheet also adds color to the eyes. Cut carefully around the mask with an Exacto Knife.  It is easier to cut off sections rather than cut around the whole mask in one cut.


Bake at 275 degrees for 25 minutes.
I baked the mask on a curved metal bowl but it could be baked flat.  Fortunately, I remembered to cut a hole at the top with a straw so I could hang the head on a keyring after it was baked.  The hole could be drilled out afterward, also.


Below is the mask my art student made.


Here is another mask, this time with two holes cut into it so it can be hung on a necklace.