Lilian Nichols--basket of flowers
We have learned to make the various flowers in previous sessions. This time we learned to make the basket to put them in.
We chose three colors plus black cut in triangles to make our Skinner blends. Notice that each triangle is a different size. From left to right, black is the smallest, second color is much larger, the third color is largest of all and the fourth color is second smallest. (If you don't know how to make a Skinner blend, almost every polymer clay how-to book tells you how. I expect that you can find directions on the Internet also.)
Annette'sChoices
DeeDee's Choices
Pauline's Choices
Next we made blended the colors by putting our triangles through our pastry blenders over and over.
Annette's
DeeDee's
We needed a long narrow strip so we folded the rectangles in thirds. We folded the black to the black, the second color to the second color and so on.
Let's follow Annette as she lengthens her now narrow strip.
Each time she ran it through the pastry blender she adjusted the pastry blender to make the strip thinner and as a result the strip grew longer. Finally it was so long that it was difficult for her to handle by herself so Lilian cranked and Annette guided the strip.
The next step is to cut a 1 1/2 inch (3.8 cm or 4 cm) piece off one end. Stack that piece on top of the new end. Proceed until you have a stack of pieces.
Below are DeeDee's pieces stacked.
Here is my stack as I am cutting it so I will have two stacks with edges like the one in Dee Dee's example.
Lay the light edges together so the new stack looks like this. I pressed these close and sliced off a strip lengthwise which I used later to make a twisted basket handle.
Pauline's
Annette's before (above) and after (below) she has added a piece of white, then a piece of black on both sides of the block. Note she has covered the long light strip side.
Now comes the squeeze and stretch time. This takes careful work because we want the various colors to keep the proportions of the original, the difference being that all of them will be smaller.
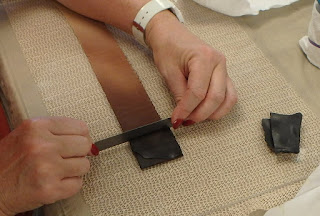
Rectangular blocks or wood or plastic can help you keep the cane the same size from one end to the other.
DeeDee's
Squeeze and stretch until you have a cane 14 inches long. (35.5 cm). The inch on either end tends to be distorted. After discarding the ends, cut the remaining 12 inch (30.5 cm) cane into 12 equal sections.
Here are 10 of DeeDee's sections of cane. She cut 2 more for a total of 12.
The next step is assembling a new cane using the 12 pieces.
Row 1
Row 2 is the reverse of Row 1, Row 3 is the same as Row 1 and Row 4 is the same as row 2.
Add thin strips of black along edges where they are needed to form a straight-edged rectangle.
Now it is squeeze and stretch time. I discovered that I had a tendency to squeeze the corners too much. I plan to practice this cane again. The center section was more evenly squeezed and stretched than the ends.
Below is my center cut.
The cane is now ready for using. I sliced off 8 slices to make the upper basket. I placed 4 in a row and the other 4 below those. I made the edges and handle by twisting the scrap I had sliced off the original stack. The lower basket is 2 rows of 3 slices.
Annette covered a small vial. the lid is to the right back.
DeeDee was still debating what she would do with her cane at the end of our session.
She cut off a thin slice to bake and serve as a reminder for future reference.


